Reviewed by Dr Sylvia Shortreed BVSc
Ticks are notoriously difficult to remove once they’ve latched on to your pet. They can be removed safely – if you know what you’re doing.
Ticks are stubborn parasites commonly found in long grass and areas of bush. They latch on as your dog or cat is passing by, and once they’ve attached, they can be difficult to remove.
Although a tick will drop off your pet after it’s finished feeding, this process can take days, during which time the tick could paralyse your pet (in the case of paralysis ticks) or pass on tick-borne infections (like in the case of the brown dog tick). The longer they stay attached, the greater the risk. That’s why it’s important to check your pet daily by running your fingers through the coat, and removing ticks as soon as you see one on your dog or cat.
This is how to remove a tick safely from your dog or cat:
1. Gather your supplies
When it comes to tick removal, being prepared with the right tools can make all the difference. Here's a handy list of supplies you'll need to safely and effectively remove a tick from your pet:
- Tick Removal Tool: This is the star of your operation. Designed for safe tick removal, it should be your go-to choice. Don't have one? They're available in pet stores, online, and some vet clinics.
- These spoon-shaped tick removal tools are a popular choice in vet clinics. They minimise the chance of accidentally squeezing the body of the tick.
- A tick hook or tick twister is another handy tool for simple tick removal
- Alternative Tools: In a pinch and don't have a tick-puller? It is important to not squeeze the body of the tick as you remove it, so fine-tipped tweezers can also work. Remember, if you're dealing with paralysis ticks, don't delay removal.
- Fine-tipped tweezers allow you to grasp in front of the body of the tick, without squeezing the body.
- Protective Gloves: Always protect yourself. Ticks can transmit diseases, so wearing gloves while removing them is recommended and wash your hands thoroughly afterwards.
- Sealed Container: Post-removal, you'll want somewhere to put that tick. A small jar or sealable container works best. This can be helpful if your vet needs to identify the tick.
- Disinfectant or Antiseptic Cream: Once the tick is removed, clean the area on your pet's skin to prevent infection.
- Flashlight: If you're dealing with a small tick or if the tick is in a hard-to-see area, a flashlight could be useful to ensure you're seeing everything clearly.
- Magnifying Glass: Similar to a flashlight, it can be handy to help ensure you've completely removed the tick.
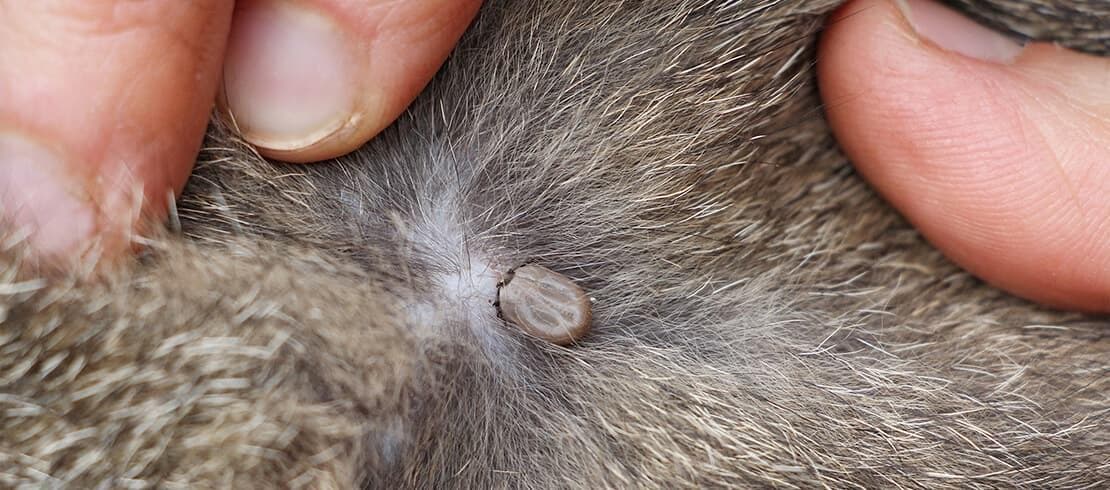
2. How to identify ticks on your cat or dog
The colour of a tick can vary from a light brown or tan to a deep, dark brown or black. Some may even appear red or orange after a blood meal. Ticks can be incredibly small, especially before they've fed. The size can range from as tiny as a pinhead or a poppy seed to as large as a pencil eraser when engorged with blood.
When inspecting your pet for ticks, you may feel them before you see them. Run your fingers gently through your pet's fur, pressing lightly to feel the skin beneath. Ticks attach themselves to the skin and can feel like small bumps or lumps. You may find ticks anywhere on your pet's body, but they favour certain areas, like the ears, head, neck, and paws.
Remember, ticks burrow their heads into the skin to feed, leaving their bodies exposed. So, what you will see is the tick's body. If you spot a tiny bump that's unlike the surrounding skin and seems to be a part of a small creature with a body and legs, it's likely you've found a tick.
If you've found a potential tick but aren't entirely sure, it's always a good idea to consult with a veterinarian. They can confirm whether it's a tick and provide guidance on safe removal and subsequent steps to take to protect your pet's health. In any case, knowing how to properly identify a tick can be the first critical step in safeguarding your pet against tick-borne illnesses.
3. Keep your pet calm and relaxed
Attempt to remove a tick only when your pet is calm. Wait until your dog or cat is still enough for you to get a good grasp of the tick with a tick removal tool. If you try to yank it out quickly, you risk leaving part of the tick behind in your pet’s skin, which may increase the risk of infection. It will be easier to remove the tick in one piece if your pet stays still. A bone or treat (such as a lick mat, jerky or kangaroo sticks) may help keep them occupied while you work to remove the tick.
4. Expose the tick
Gently part your pet’s coat around the tick and keep it flat with one hand, leaving your other hand free to remove the tick. Take your time with this step to ensure success. Because the tick has already latched on to your dog or cat, it will stay in place and probably won’t move around after you expose it.
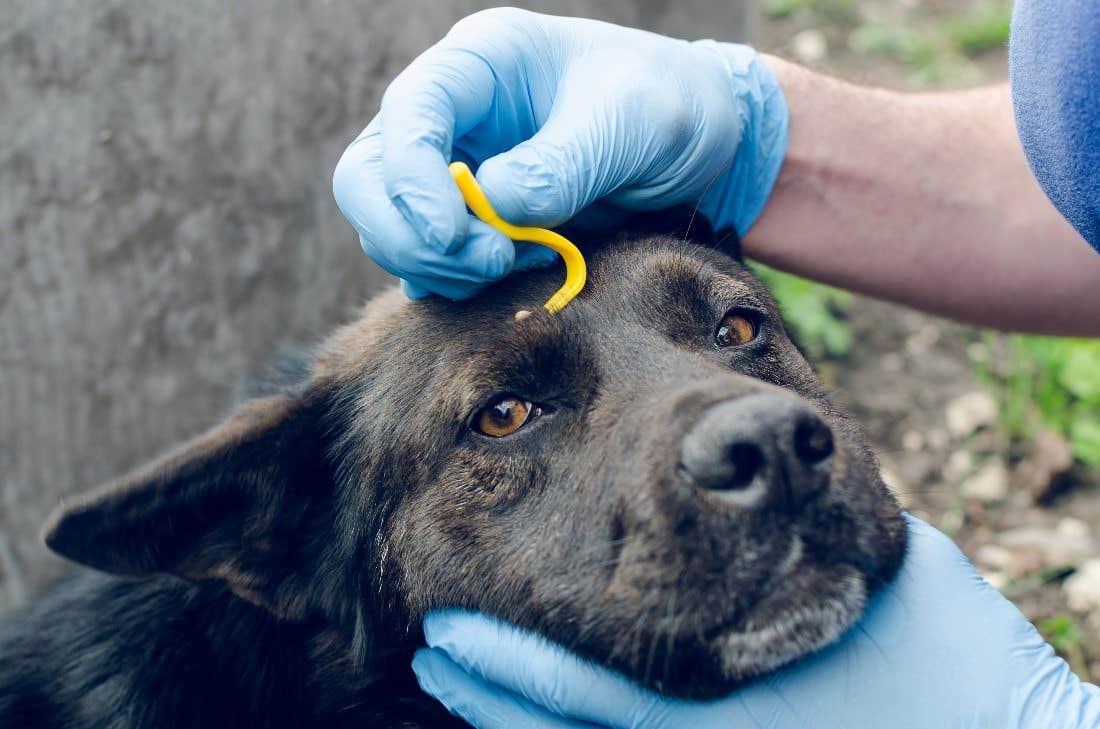
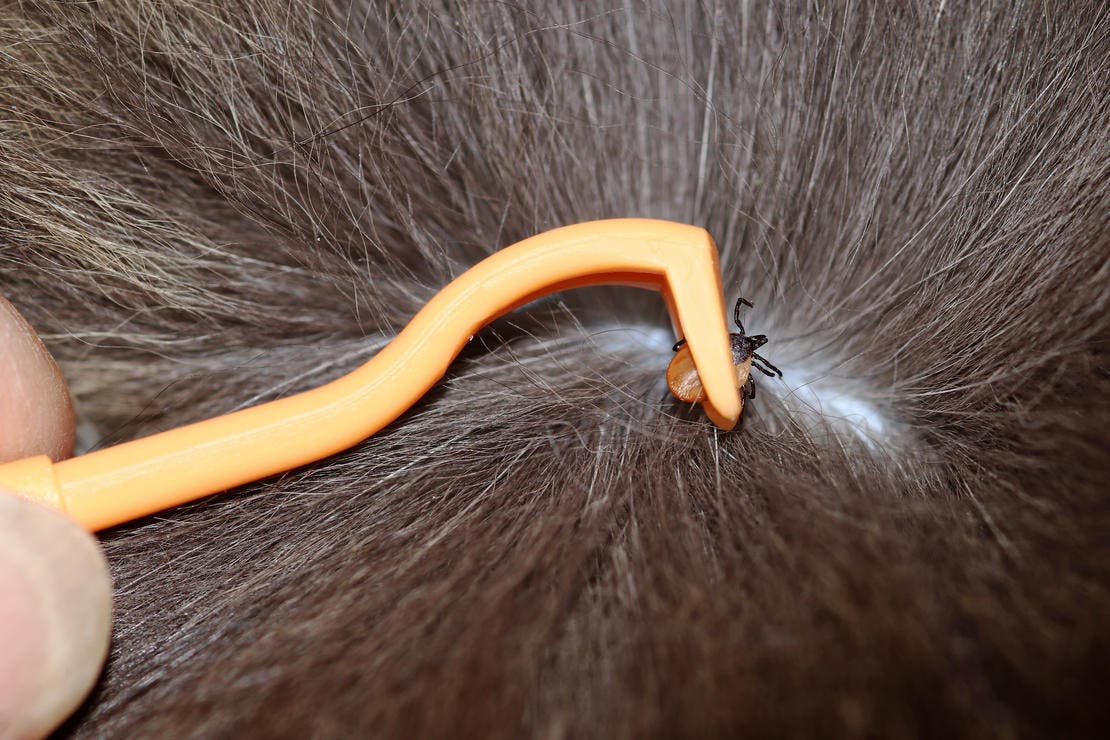
5. Use a tick removal tool to twist and pull the tick from your pet
The tick removal tool is shaped to get under the parasite’s body and pull it out in one go, without squeezing.
If you don’t have a specific tick removal tool, ensure the tweezers you use are fine-tipped. Regular tweezers are not recommended for use in tick removal, as these are likely to crush the tick, and may lead to more toxin being injected into your pet while squeezing it.
Follow the instructions on your tick removal tool. Generally, the steps are:
- Place the hook of the tool against your pet's skin, alongside the tick.
- Carefully slide the tool underneath the tick, trapping the tick in the wedge of the hook.
- Gently pull the tool away from the skin while twisting, to remove the tick.
- Clean the tick bite
Gently wipe the affected area on your pet with an antiseptic designed for pets.
What should you do if a tick head is still stuck in your pet?
When all is said and done, a tick head being left behind in your pet’s skin should not be a major source of worry. As long as the body has been successfully removed, the head is unlikely to cause any health problems for your pet. Often the best course of action is to leave it be, keep the area clean and monitor your pet’s skin for any changes — nature will usually take care of the rest.
6. Dispose of the tick
Drop the tick into a lidded jar or sealable container, close the lid and keep it to show your vet in the event that your pet becomes unwell. Clean your tick tool with disinfectant and store it somewhere safe for future use. Dispose of the gloves and wash your hands thoroughly.
7. Observe for potential post-removal symptoms
Now that you've removed the tick from your dog or cat, it's time to move into a crucial phase of post-removal care: observing for potential symptoms. While you've taken significant strides to ensure the tick is safely removed, your job is not finished yet. Ticks are not merely bothersome pests; they can also be carriers of serious diseases that can infect your pet. The symptoms of these diseases can take time to appear and may not be evident immediately after you've removed the tick.
If you are in a paralysis tick prone area, watch your pet closely for any signs of weakness or change of behaviour, or get your pet checked as soon as possible by a veterinarian. Don’t forget to take the tick you have removed with you to be identified if possible.
In the days and weeks following the removal of the tick, monitor your dog or cat closely for any changes in behaviour or health. A lethargic or unusually tired pet might be an early sign of an infection. If your dog seems to be sleeping more than usual or has a reduced appetite, these can be signs of tick transferred infections such as Ehrlichiosis, and your dog will need veterinary treatment.
8. Keep ticks from biting your pet in the first place
It's been rightly said that prevention is the best medicine, and it's certainly true when it comes to tick prevention for pets. Reducing the chance that you'll ever have to remove ticks from your pet is the ideal approach and can save both you and your furry friend from potential discomfort and health issues.
Among the top methods of prevention, the use of tick repellents stands out. Products like the Seresto™ collar for dogs and cats, or Advantix™ spot-on treatment for dogs are designed specifically to repel and kill ticks upon contact. These highly effective treatments not only combat ticks but also target fleas, another common parasite that pets may encounter.
These preventive measures are all about creating a shield around your pet. The Seresto collar is a convenient option that releases its active ingredients in low concentrations over an extended period, providing long-lasting protection against ticks and fleas. It's non-greasy, odourless, safe and easy to use on dogs and cats.
Advantix™, on the other hand, is a spot-on treatment for dogs only that needs to be applied directly on your dog's skin, usually at the back of the neck where they can't lick it off. It's waterproof, which makes it a great choice for dogs who love to swim or need regular baths.
Another easy and effective tick preventative that’s great for dogs that swim regularly is Credelio™ PLUS, a small palatable chew that is given once a month and protects your dog not only from ticks, but also from fleas, mites, heartworm disease and intestinal worms for a full month.
While these products are immensely helpful, they're part of a broader approach to tick prevention. Daily tick searches of your dog and cat are recommended if you are in a paralysis tick-prone area. Keep their bedding clean and try to limit their exposure to tick habitats during tick season.
Always read and follow product labels before use.
PRODUCTS

Credelio™ PLUS for Dogs
Credelio™ PLUS 4-in-1 protection in the smallest chew keeps your dog protected from ticks, fleas, demodex mites PLUS heartworm and intestinal worms.

Seresto™ Collars for Cats & Dogs
Seresto provides long-lasting flea protection for cats and dogs for 8 months, and tick protection for dogs for 4 months