Step-by-step guide to dog tick removal.
Ticks are stubborn parasites commonly found in long grass and areas of bush. They latch on as your dog passes by, and once they’ve attached, they can be difficult to remove.
Although a tick will drop off your dog after it’s finished feeding, this process can take days, during which time your pet could experience irritation. That’s why it’s important to check your dog’s coat and remove a tick as soon as you see one. Here’s how to do it safely.
How to remove a tick from a dog in 6 steps
1. Gather your supplies
The first thing you need to start the tick removal process is a tick-removal tool specifically designed to help you safely remove ticks from your dog in one piece. You may also use tweezers with a pointed end if you don’t have a tick-removal tool. If you don't have the right tool, and you are concerned your dog is uncomfortable, then you should contact your local vet to seek assistance.
You can use gloves to protect your hands during the tick removal process.
Finally, have a sealed container handy to dispose of the tick after you remove it.
2. Keep your dog calm and relaxed
Only try to remove ticks from your dog when they are calm and lying down. Wait until your dog is still enough for you to get a good grasp of the tick with the removal tool. If you try to pull it out quickly, you risk leaving the tick head stuck in your dog, which can lead to development of an infection. It will be easier to remove the tick in one piece if your dog is still. A bone or treat may help keep them occupied while you work to remove the tick.
3. Expose the tick
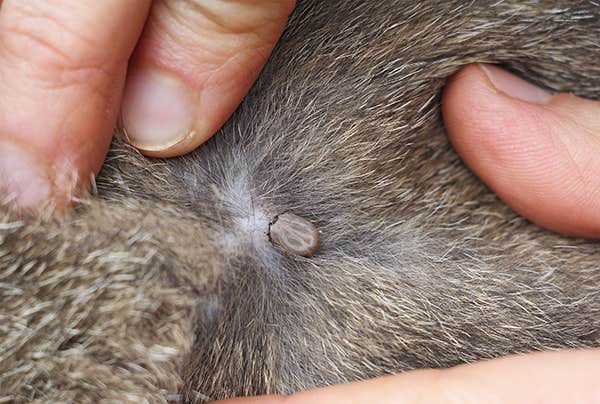
Gently part your dog’s coat around the tick and keep it flat with one hand, leaving your other hand free to remove the tick. Take your time with this step to ensure success. Because the tick has already latched on to your dog, it will stay in place and probably won’t move around after you expose it.
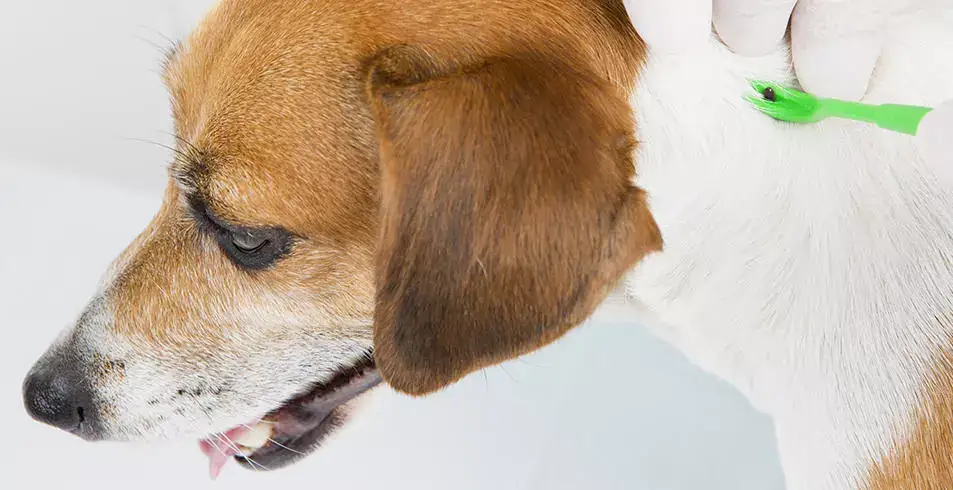
4. Use a tick-removal tool to pull the tick from your dog
The tick removal tool is shaped to get under the parasite’s body and pull it out in one go, without squeezing. These tools can be bought from the chemist or local vet clinics as well as some supermarkets. Please read the instructions supplied with the tick removal tool before using it.
Regular tweezers are not recommended for use in tick removal, as these are likely to crush the tick, and may leave part of it inside your dog. While tweezers aren’t recommended for removing a tick, if you don’t have a tick removal tool on hand, use tweezers with narrow, pointy tips rather than ones with angled or bevelled tips.
Follow the instructions on your tick removal tool. Generally, the steps are:
1. Place the hook of the tool against your pet's skin, alongside the tick.
2. Carefully slide the tool underneath the tick, trapping the tick in the wedge of the hook.
3. Gently pull the tool away from the skin while twisting, to remove the tick.
5. Clean the tick bite
Gently wipe the affected area on your dog with an antiseptic designed for pets or use soap and water.
6. Check for other ticks on your dog
Drop the tick into a lidded jar or sealable container, and securely dispose of it. Clean your tick tool with disinfectant and store it somewhere safe for future use.
Keep ticks from biting your dog in the first place
To reduce the chance that you’ll have to remove ticks from your dog, use protection regularly such as the Seresto™ collar for dogs. Once applied to your dog, it works to repel and kill ticks on contact as well as stopping fleas from biting and feeding on your dog within three to five minutes and kill adult fleas and their larvae within 20 minutes.
Read our guide to help you safely remove ticks from your cat.